If you have been using the current UX for quite some time you would have probably realized by now that models and apps are two different entities/sections within Anaplan, and they are not connected to each other by default—unlike Classic UX where dashboards were part of the same model and were always connected or attached to the same model. If you had to archive the model and bring another model online for end users, that was a pretty simple exercise, but in the current UX that is not the case. Currently, as soon as you archive the model all the underlying pages of the app that use the model vanish from the app, or the entire app disappears if the whole app is based on only one underlying model. This article covers how you should change the source model of an app if the existing model needs to be archived. First, let’s understand what happens when the model gets archived.
 Page - before the model was archived
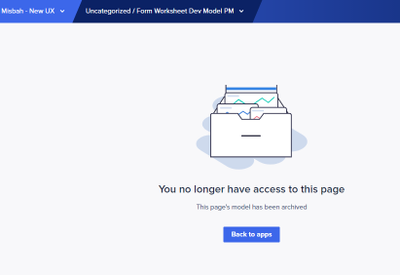
Upon archiving the model, the below error message gets displayed if the users have this particular page open and if they refresh the browser or move back to the page section of an app, the page will not be visible within the app.

Page - after the model was archived
However, If you wish to bring back your archived model, all the pages of an app, or the entire app, appear again to end users without any issues. But what if you want to bring another model back live and archive the current production model?
Follow these steps:
Step 1: Before you archive the model (Model A), create another model (Model  from the latest revision tag option. This is an intermediate step that is required so that you can change the source model of a page/s to this newly created model. To create this new model, you will have to go to Revision Tags and then click on "Create Model From Revision" as shown below. Make sure all large lists and transactional lists are marked as production data so that the smallest model gets created. Note: Don't use the COPY option to create the model because it will copy all of the list items and production data, and you will consume as much space as the actual production model.

Step 2: Change the source model of a page from Model A (that needs to be archived) to Model B (that was created from the latest revision tag in step1). In order to change the source model of an app, go to
Apps >Pages >Click on the Ellipsis >Page Settings >Source Model >Add Model.


Note: Make sure the "Enable multiple source models" toggle option is enabled.
An alternative way to change the source model of the page is to go to
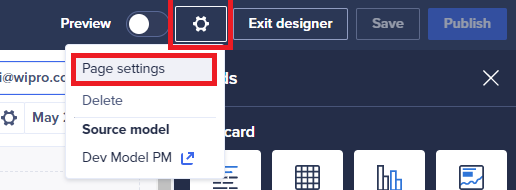
Page Designer mode > Settings >Page Settings >Source Model > Add Model.

Step 3: Archive Model A
Go to Manage Models >Change Mode >Click on the model > Archive.


Step 4: Bring the new Prod Model (Model C) live for end users. If the model is in a different workspace, then the model can be imported into the current workspace.
Step 5: Now change the source model of a page from Model B to Model C.
Step 6: Repeat Step 5 for all Pages within the app that we're using Model A as an underlying model.
Step 7: Delete Model B.
With this process in place, you should be able to change the underlying source model of a page/s or an app. Currently, it is not possible to have an alert set before you archive the model, so it becomes important to follow the process to avoid any disruption to end users.
Contributing author Rob Marshall.