What is covered in this article?
First of multi-part articles, this article presents how to build creative integration designs using serverless platform on Amazon Web Services (AWS). You will learn how to deploy a AWS lambda function that makes a request to Anaplan Authentication Service to generate a token. You will also learn a popular concept of “principle of least privilege” and Identity & Access Management (IAM) in AWS to control access to code deployed in AWS.
What is NOT covered in this article?
This article does not cover details on following topics:
- Anaplan Authentication API
- Python scripting
- AWS Cloud Computing concepts (VM, Containers, Serverless, etc…)
What pre-requisites do I need?
- Knowledge of Anaplan Platform & Model Building Concepts.
- Familiarity with Anaplan APIs and their functionality.
- Python, Webhook concepts.
- Familiarity with AWS Cloud Computing concepts.
- Curiosity and passion for learning.
Introduction
The objective of the multi-part articles is to present how to use different AWS technologies to build a DialogFlow bot that can interact with Anaplan platform. We will use AWS serverless infrastructure, known as, lambda function, to interact with Anaplan.
To refresh memory on topics that were already covered in other articles (ex: CA Certificates, Bulk API, Transactional API, etc…), we will provide direct links to them throughout these multi-series articles. Below is the list of topics we are planning to present over several articles:
- Part 1: Authenticate to Anaplan and generate a valid token every time we want to call an Anaplan API.
- Part 2: Execute Anaplan Actions
- Part 3: Call Anaplan Transactional API
- Part 4: Learn how to interact with a DialogFlow bot and a webhook
You should be familiar with Anaplan concepts such as authentication, Anaplan actions, and transactional APIs. If you are new to Anaplan API, this article will give you a high-level summary of functionality Anaplan APIs provide.
Remember, we will be building integrations using infrastructure and services on AWS Cloud.
Using Anaplan APIs on AWS Cloud
AWS (Amazon Web Services) is a powerful set of services that can be leveraged to make the Anaplan experience even more interactive.
Our project, in this series of short articles, is to build & deploy small and efficient recipes on AWS cloud. In the final part of the series, we will bring all that we learned together to address an interesting and interactive use case.
For this purpose, we will use and create several AWS objects like “lambdas” (serverless methods mainly meant to invoke Anaplan’s APIs).
The code we will use will be based on Python with some code from previous articles. However, nothing prevents you from using other languages (I am a big fan of Kotlin for instance). The real advantage in using Python with Lambdas is that you can have an editable view of the code they are based on.
There will be a lot of references to previous articles and blogs in that series. We strongly recommend you visit those pages as there might be a lot of details on specific topics.
Authentication
Before starting
The objective of this part is to build a lambda function that will always be able to provide a valid token for each of your future API calls. Your lambda function will look like this:
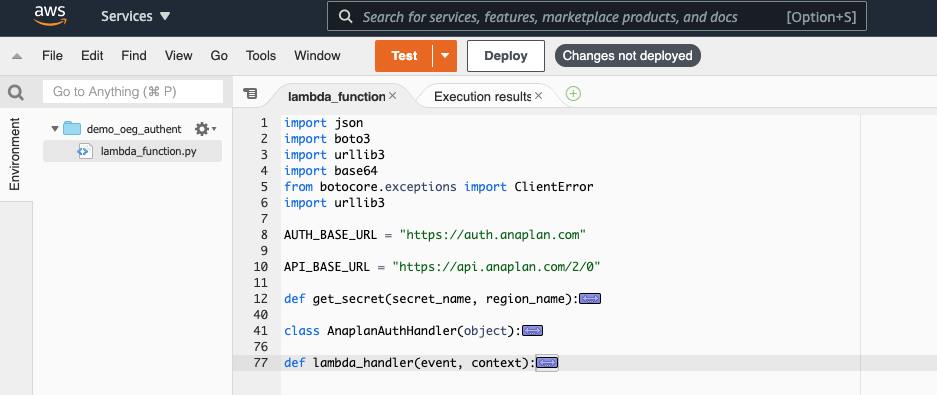
We must consider security when it comes to passwords or passphrases. Your lambda function will access Anaplan credentials stored securely somewhere in AWS, a class that will handle the necessary steps to get a valid token and finally the lambda handler, which is the function that is called by AWS lambda when it is activated.
Unlike the article on Anaplan CloudWorks API where we had to implement a layer containing the canonical version of the famous requests library (in step 3), we will be using the urllib3 library. Its use might be a bit more complex than requests’ but the greatest advantage is that you will not have to handle runtime dependencies, the code you will write or download will be immediately executable.
Let’s get started
First, we need to start with the beginning: How are we going to handle authentication? Like any secured transaction performed on the web, Anaplan APIs need to embed the identity of the requester to successfully trigger intended action. As you know, Anaplan, in its version 2.0, supports a token-based authentication. This means, you need to prove you are a rightfully defined Anaplan user and then you’ll receive a token that you can use for around 35 minutes.
We have 2 ways to get authenticated to Anaplan:
- Send a first call to Anaplan API server with the actual credentials (Basic Authentication).
- Use CA certificates.
We will show here the first method (if requested, we will issue another article on a way to use CA certificates with lambdas and Secrets managers). We strongly recommend you read this blog. It will give you a deep insight into the functioning of CA Cert based authentication method.
Anaplan Operations Excellence Group (OEG) advise: Using CA Certificate-based authentication will save you from the effort of updating your password every x months (3 months usually).
Note: as you can deduce, the actions will be triggered under a unique identity (usually a technical user linked to a generic email). In future, we might deliver the possibility to take into account the user calling for that action.
Secrets Manager
Whether you are using basic authentication (username, password) or CA Certificate authentication, you don’t want to store sensitive information such as passwords & passphrases in your code. AWS provides the ability to store sensitive information in a Secrets Manager. It is a good practice to use AWS Secrets Manager. Using Secrets Manager, you are also able to control access to secrets via AWS IAM roles & permissions. This will help us define access using “principle of least privilege”.
Once you select the type of Anaplan authentication method, you will store credential information in a secret that’s created in Secrets Manager. In this article, we will be using Anaplan’s Basic Authentication. Therefore, we will create two secrets (user, pwd) in Secrets Manager. Following steps will help you navigate through the steps.
- Search for Secrets Manager in the search window and select it.
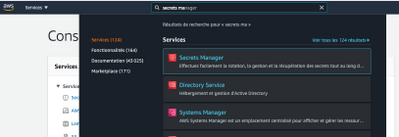
- There are several types of secrets. We will use the simplest one: ‘Other types of secrets’
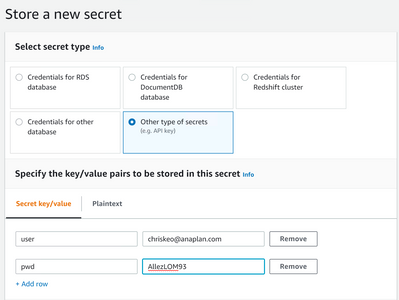
- Create 2 secrets (user, pwd) with values for each secret. These values will be your Anaplan account credentials. As discussed earlier, this user is the technical user whose identity and selective access will be utilized.
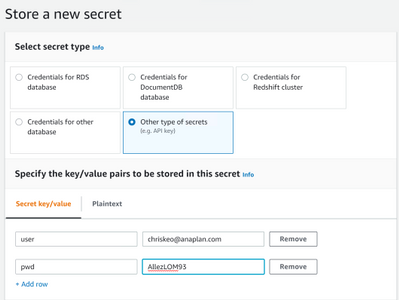
- Provide name for the secret and click Next.
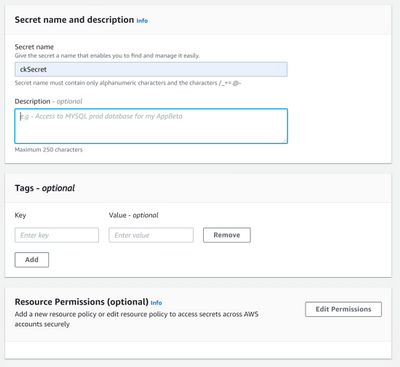
- The following screen asks for an automatic rotation. We will ignore that for the moment.
Finally, click on “Store” in the last screen.
- As shown below, copy the Secret ARN and store it in a file. You will need it in a later step.
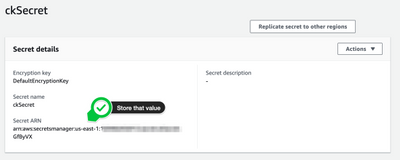
Before we start using our secrets in our lambda function code (python), we need to define access to this secret using “principle of least privilege”. In the next section, we will create an AWS role that will grant access to this secret.
Create a role
Note: In terms of best practices, it is always recommended to execute AWS actions with a role to which we only gave necessary rights (“principle of the least privilege”).
We will create a role that will, initially, have access to the secret we created. We will, gradually, expand its privileges as we implement new features.
- Open Services => IAM, select “Roles” on the left menu and click on “Create role”.

- In the following screen, select the use cases “Lambda”. Click on “Next: Permissions”.
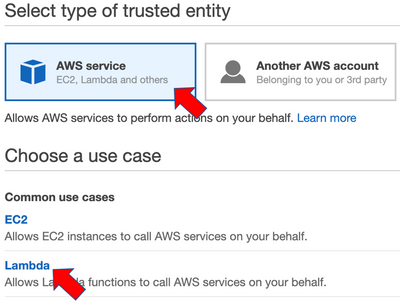
- Then select “Create policy”. This will open a new tab.
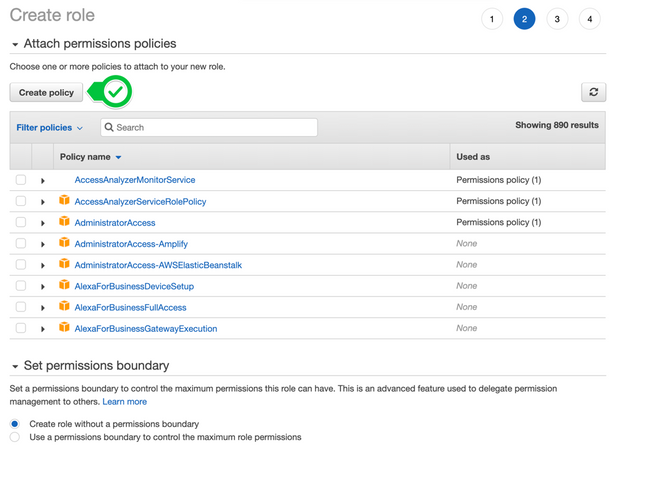
- In the new tab, under “Service”, look for “Secrets Manager”.

- For Actions, just select “GetSecretValue”
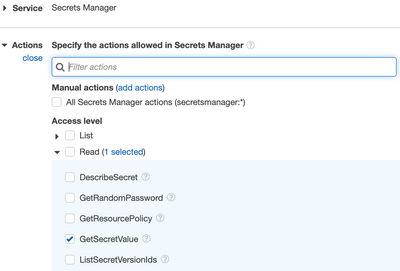
- We only want to retrieve values for the secret we created earlier. Recall, you copied and stored ARN from secret earlier? You will need that ARN now. Click on Add ARN to restrict access to the secret.

- Paste ARN value that you stored earlier.
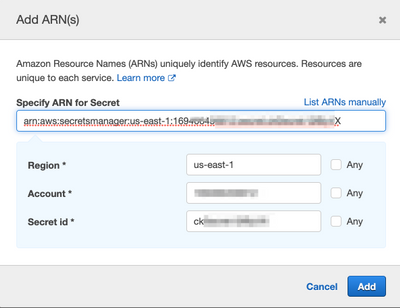
- Click Next:Tags => Next: Review
- Finally, give a name for this Policy and click on Create Policy

- Now, go back to the previous tab (where you were creating a role) and look for the new policy you’ve just created.

- Select the policy and click on Next: Tags Next: Review
- Give a meaningful name to the role and finally click on “Create role”.

- You, now, have a role that can retrieve secrets.
- Open Services => Lambda and select Create Function
- Choose Author from scratch
- Provide a valid name

- Since we will be using Python for scripting, select Python 3.8 for Runtime.

- Choose existing role OEG_DemoRole

- Now, it’s time to code a python script that will authenticate to Anaplan and generate authentication token.
Python Code
- Go back to the lambda screen, double-click on the “lambda_function.py” and delete any existing code. We will replace it with the python code in the file “lamda_function.py” that’s included with this article.

- Copy & paste the code from lamda_function.py file provided with this article. You will need to update the script providing your secret name and the region name.

Examining the code
In this section, we will examine & explain the code.
First step in generating the authentication token is to retrieve secrets (user, pwd) and values for secrets. AWS SDK for Python and boto3 package is used to access secrets in a secret manager. Code presented in this article to retrieve secrets and values has been adopted from sample code provided in boto3 documentation found here.

Second step is the class AnaplanAuthHandler that makes a call to Anaplan Authentication API to get a token.

The first function “basicAuthenticate” will encapsulate the other two functions. It will first try to perform an authentication request and then try to parse the response from that request.
The second function (_make_authentication_request) instantiates a PoolManager instance and then will use the credentials in the request headers. Note that there is a necessary step to encode the credentials string in base64.
The last function (_parse_authentication_response) will be using the response from the second function. There is a need to convert it into a json object (the response format is as follows):

The objective is to get a response in the following JSON structure:

We would like to return a JSON object with HTTPS status code, a status message, and potentially a token value. We would like the output to have these values (independent of a successful request) so it always returns the same format: status, statusMessage, and tokenValue.
We are also checking for different conditions:
- If HTTPS status code is 401, we want the function to return a message “Wrong Credentials” with a token value of empty string.
- If HTTPS status code is not 201 and API status is not “SUCCESS”, then it means our request was successful and we want the function to return a message with status code, statusMessage, and the tokenValue.
Finally, the lambda handler function will simply use those last 2 Python objects and return a response that can be assessed in further processes.

You can now save the lambda by clicking on “Deploy” and test it.
If everything goes fine (and even if that’s not the case), you should get a response shaped in a json string.
Best Practice: Information encryption
We managed to have our code working using credentials basic strings. Nevertheless, we may not want to have information stored in clear text. Even if we use a dedicated solution to store secrets, it would be more security-compliant if we can add another level of secrecy by encrypting.
In this previous article, we demonstrate some ways to encrypt. We recommend you follow these principles or use some of the tools that are available in that article to encrypt your information.
If there is enough interest and demand, we can consider providing step-by-step instructions on how to use those previous articles in the context of a lambda (don’t hesitate to request it in the comments section).
In summary
We now have a basis on which we can build upon for further interactions. For each Anaplan API call, it is required to have a valid token. Thanks to what we’ve seen in this article, you will be able to generate the token for each of your future API requests.
In the next article, we will see how to use this token to perform Anaplan’s API actions. Stay tuned and don’t hesitate to give your feedback in the comments section.
Happy coding!
Got feedback on this content? Let us know in the comments below.
Contributing authors: Christophe Keomanivong and Joey Morisette.