
Author: Dave Waller, Principal Product Manager at Anaplan.
With the introduction of parallel tasks, Anaplan Workflow Advanced can bring additional efficiencies by parallelizing process steps that would ordinarily have to run in sequence. This functionality can help when using Anaplan Data Orchestrator to dramatically reduce the overall running time of data movement steps that would normally run sequentially:
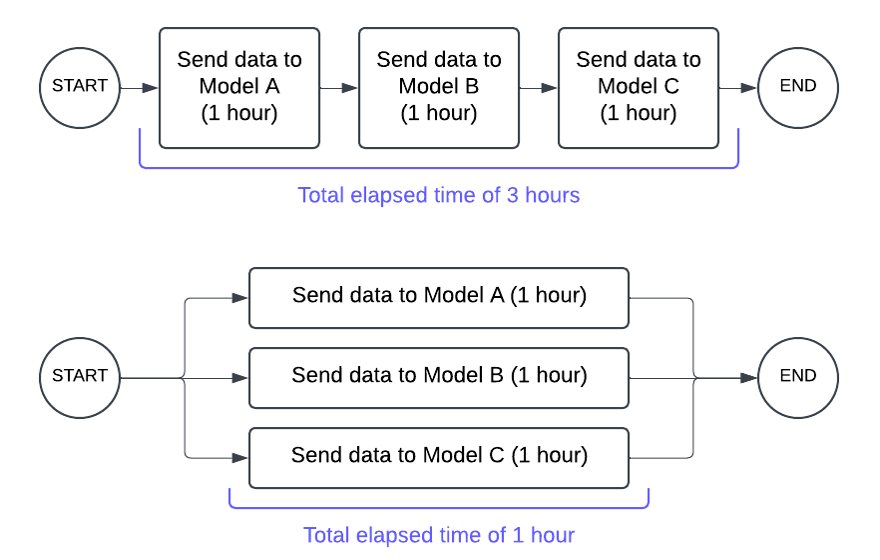
However, parallel tasks can be applied to multi-stakeholder planning processes to accelerate planning, provide users with unique and tailored experiences, and drive collaborative engagement.
Examples of this may include a distributed approval process where a new CAPEX project requires commercial approval, marketing approval, and production approval before it can be progressed.
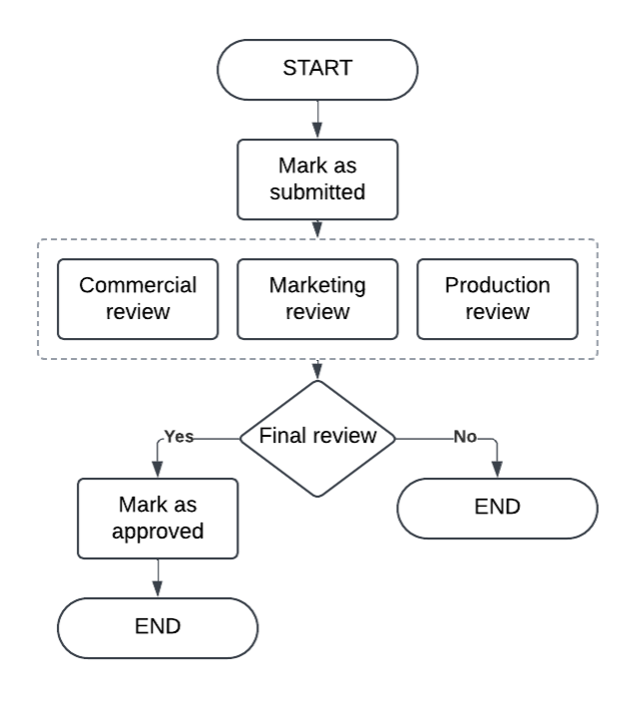
Each of these approvals can take place at the same time but, given the nature of each stakeholder, they all require a unique UX page and a unique set of instructions.
Parallel workflow steps, and value-based decisions are only available as part of Workflow Advanced.
How-to guide
This guide assumes a working knowledge of Workflow, including the build and setup of:
- End user triggered workflows
- Line item driven decision steps
- Skippable decision steps
- Configuring decision steps with Boolean data writes
We’ll look at a scenario where end users are asked to create and submit new project proposals as part of a simple CAPEX use case. Once submitted, the project will be issued to three independent approvers who will each review the proposal based on their area of expertise. Once each approver has provided input and completed their review, we’ll consolidate those results and decide how best to proceed.
This article will guide you through the steps required to build this scenario and will provide two approaches to handling the consolidated review, one based on asking a final reviewer to analyze the previous approvals and make a final decision, and a second where a calculated Boolean will be examined to determine the overall approve/reject decision.
UX and model requirements
This example leverages several stakeholders who all need their own experiences building as UX pages. We will need:
- An end user UX page to support the creation and submission of new promotions
- A commercial review page to enable commercial review approval
- A marketing review page to support addition of marketing milestones and approval of the project
- A production review page to ensure product manufacturing are happy to approve
- A final review page that helps a user in Operations review the approvals before adding a final approval, rejecting the project, or sending it back for rework
A number of model components are also required to support this scenario, starting with a list into which new projects will be added.
We will also define our approvers in a lookup module — this one is simple but could be extended to support a wider range of approvers so our projects can have them assigned based on model logic.
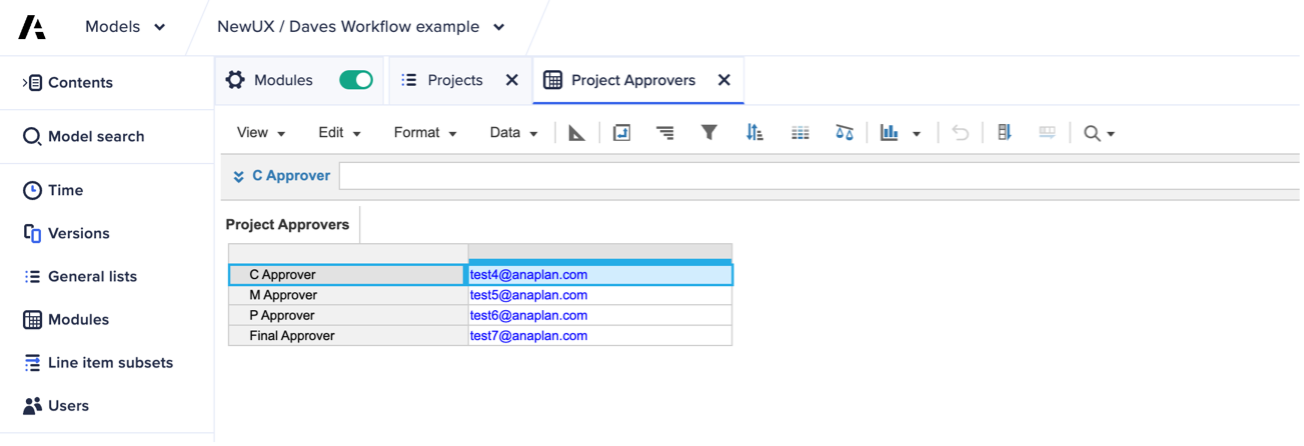
Image: A lookup module defining our approvers
We need a module to hold the details of our projects, and we’ll combine this with tracking data and approver details to keep things all in one place. We need to make sure this module is dimensioned by our projects list.
If we were to split this into multiple modules (one for project data and one for workflow data) then they both need to be dimensioned by the same projects list.
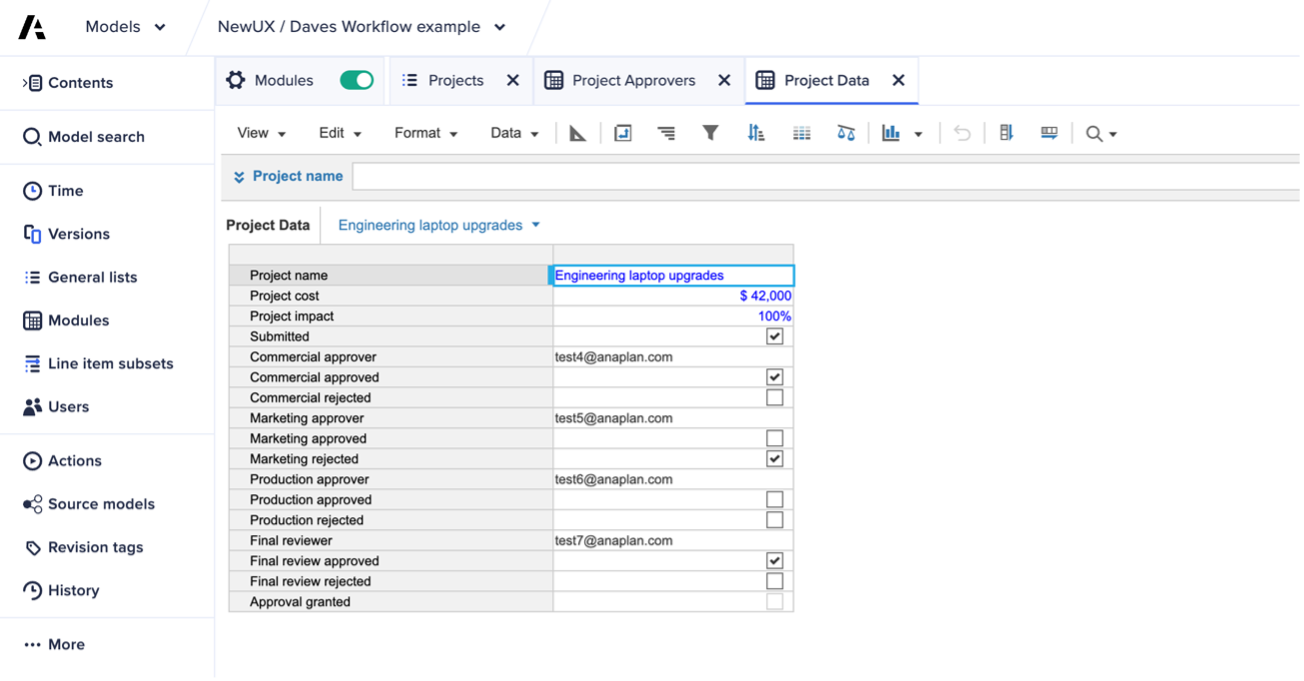
Image: The module to hold project data and workflow progress tracking information
This is how our projects module looks, with combined line items for defining our projects as well as tracking the progression of projects through our approval process:
Line item | Use | Formula |
|---|
Project name | Text – the name of the project input using a form | - |
Project cost | Currency – the investment required for the project input using a form | - |
Project impact | Percentage – the anticipated revenue impact of the project | - |
Submitted | Boolean – used to track which projects have been submitted for review | - |
Commercial approver | User list – the user to complete the commercial approval | Approvers.’C Approver’
|
Commercial approved | Boolean – used to track when commercial approval is complete | - |
Commercial rejected | Boolean – used to track if commercial approval is rejected | - |
Marketing approver | User list – the user to complete the marketing approval | Approvers.’M Approver’
|
Marketing approved | Boolean – used to track when marketing approval is complete | - |
Marketing rejected | Boolean – used to track if marketing approval is rejected | - |
Production approver | User list – the user to complete the production approval | Approvers.’P Approver’
|
Production approved | Boolean – used to track when production approval is complete | - |
Production rejected | Boolean – used to track if production approval is rejected | - |
Final reviewer | User list – the user to complete the final review and approval | Approvers.’Final Approver’
|
Final review approved | Boolean – used to track when the project is completely approved | - |
Final review rejected | Boolean – used to track if the project is rejected at the final stage | - |
We could also extend the scenario to only require commercial approval if the investment required for the project is greater than $25,000. This adds a simple formula to the “Commercial approver” line item:
Line item | Use | Formula |
|---|
Commercial approver | User list – the user to complete the commercial approval | IF Project cost >= 25000 THEN Approvers.’C Approver’ ELSE BLANK
|
We’ll use this in the rest of the example to show how a single, parallel step can be set to skip if it is no longer needed.
Workflow template
Our workflow template starts simple and includes a machine task that writes to a Boolean cell to identify the project has been submitted. The submission of projects is from an action button on a UX page, so our machine task has the “Projects” context set to “Sync to workflow”. This means that the project being reviewed will be automatically “passed into” the workflow and used to identify the specific data points to be written to with data write actions or used to look up assignees and approvers.
Once marked as submitted, we can progress projects to our three approvers.
Before we can add additional approval steps to run in parallel, we need to start the configuration of our commercial approval. We first need to provide a title and some instructions before selecting the appropriate page to use for the review. We also need to disable branching by toggling the “Continue workflow on rejection” switch to the “off” state.
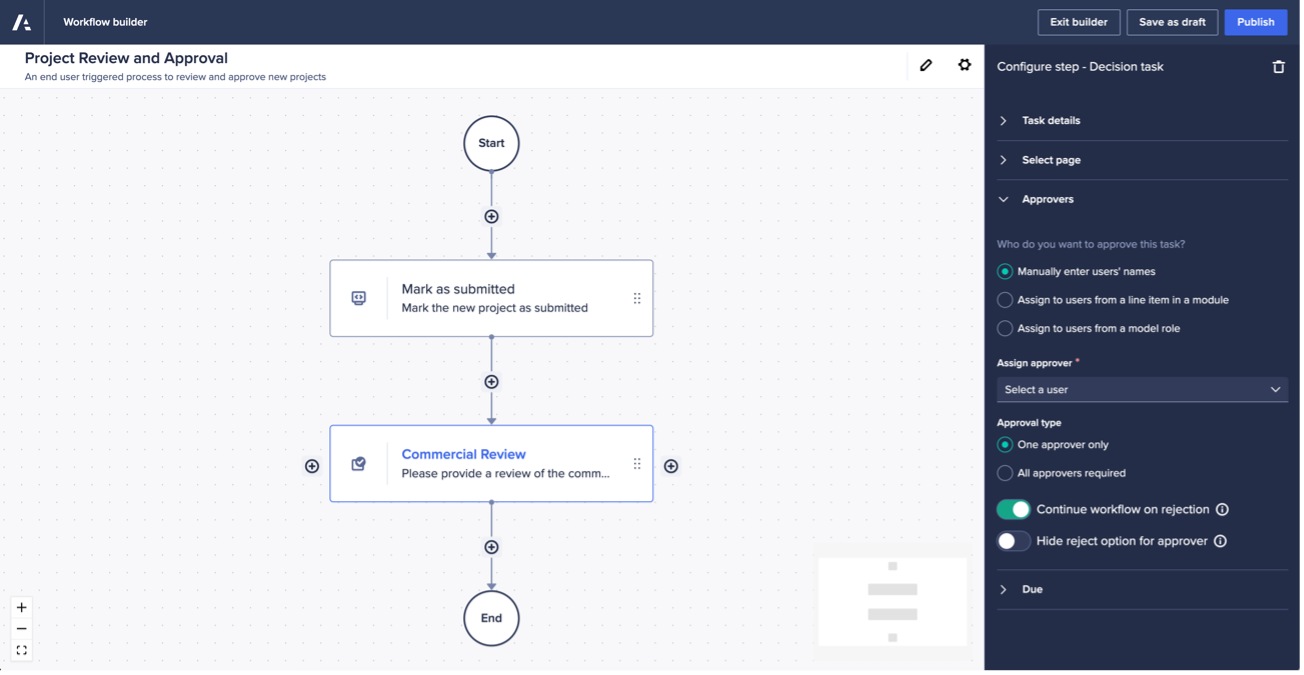
Image: The first approval step with its initial configuration in place
Both branching and stopping a workflow on rejection are disabled when using decision steps in a parallel block. This ensures that no one part of the parallel block can prevent others from executing. Instead, you can leverage Boolean data writes and a final decision step to build your process, as we’ll do later.
We can now instruct Workflow to execute our additional approval steps in parallel by clicking the (+) button to the side of the step we’ve just added.

Image: This shows the first approval step added to the template with the (+) highlighted to add a parallel step
By selecting to add a second approval step you will see that both have now been wrapped in a “parallel block” to indicate that each step will be issued in parallel. We can click to add our third approval step to the parallel block before configuring each one.
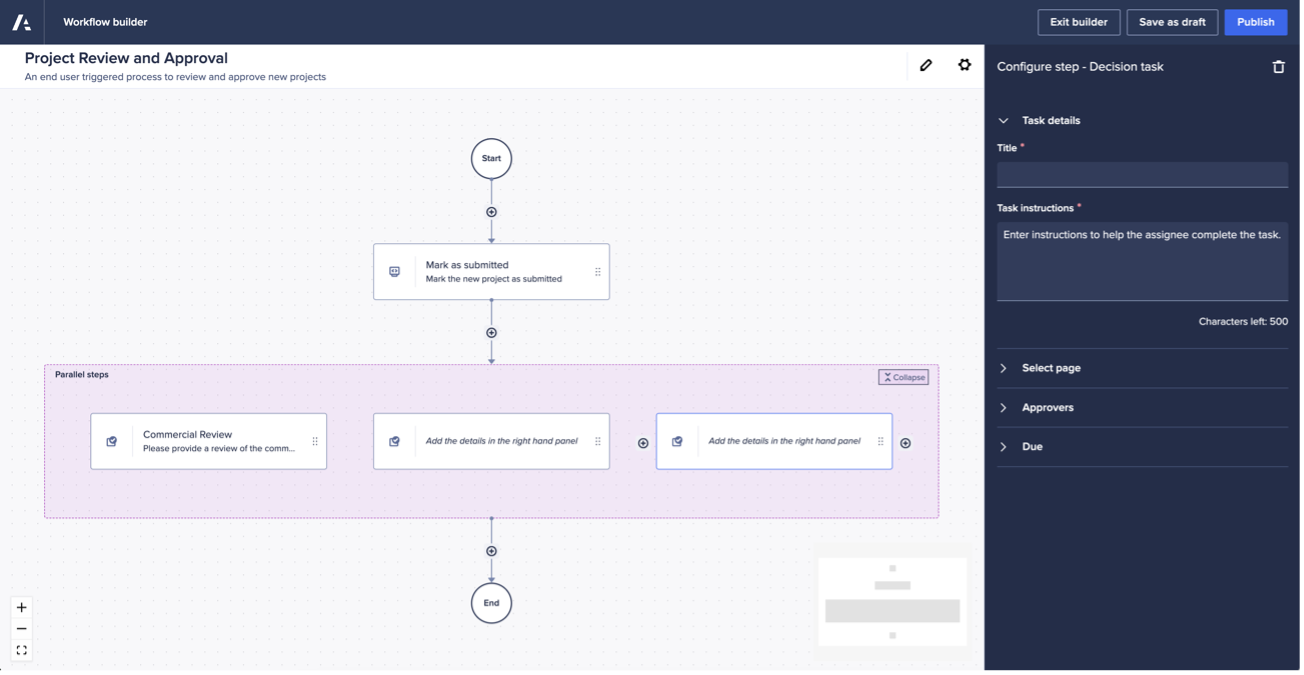
Image: Three approval steps added in parallel
Our first approval, although all three will be triggered at the same time, is the commercial approval which we have pointed at our commercial review page and set to assign based on a line item.
When assigning the approval step using a line item, we can specify the user list formatted line item to use. In this case, we have selected our “Commercial approver” line item.
Our commercial approval step is also configured to write to the “Commercial approved” Boolean if it is approved, and the “Commercial rejected” Boolean if it is rejected. We have also set the “Projects” context to “Sync to workflow” so that the project being reviewed can be used to pinpoint the exact data points to read and write to.
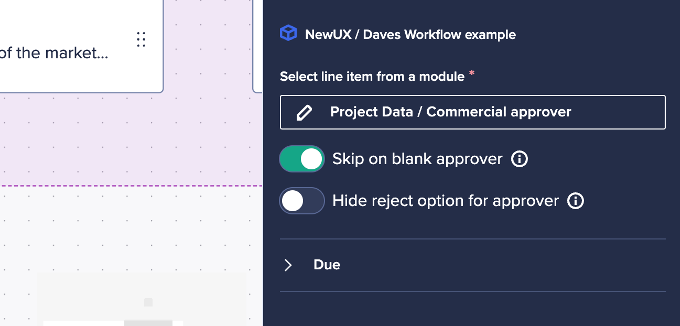
Image: The Commercial approval step with “Skip on blank assignee” enabled
Finally, we want to set the approval step to “Skip on blank assignee” so that we can respect the model logic that drives whether an approval of this type is needed or not.
The other two approval steps can be configured in the same way, each using their own page and line items, remembering to sync the “Projects” context to workflow for each one.
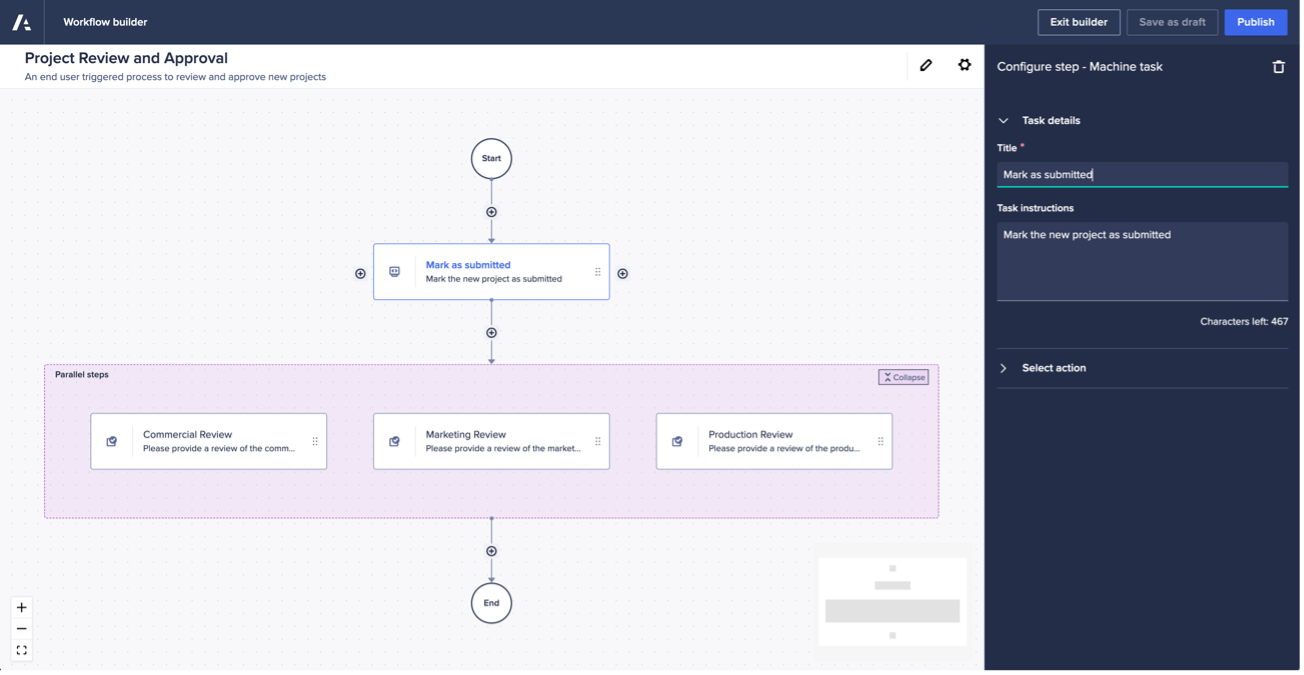
Image: All three approval steps configured inside a parallel block
The final step in our simple approval process is to provide a final reviewer with an interface that lets them review each of the previous approvals before deciding on whether the project should be fully approved or not.
To complete this step, we’ve built our reviewer a bespoke UX page that provides details of the project as well as simple visualisations to indicate whether commercial, marketing, and production approvals were required or gained. This has involved the creation of some additional line items to support the required UX cards and conditional formatting and is something that can, if needed, be automated based on upcoming functionality.
A final decision step is added to the template and configured to point to the correct page, using a line item in a module to drive the approver. The module configuration has selected the “Final reviewer” line item for the user and the “Final review approved” / “Final review rejected” Booleans to track the outcome of the review. Again, the “Projects” context is set to “Sync to workflow” to ensure the correct data points are read and written to.

Image: The completed workflow template with parallel approval steps and a final review
This concludes the build of the workflow template. It can, of course, be enhanced with other steps like model actions to move approved projects into different modules for reporting, or line item driven notifications to project submitters. But, for the purposes of this example, we can leave the process template there.
Extending the workflow template with send-back loops and automated decisions
This process is particularly “one way” and doesn’t provide any mechanisms for contributors to make changes should their project be rejected. This can be addressed using the send-back functionality that will provide, in addition to “approve” and “reject”, a third option to allow the final reviewer to “send back” the submission to a previous step in the process.
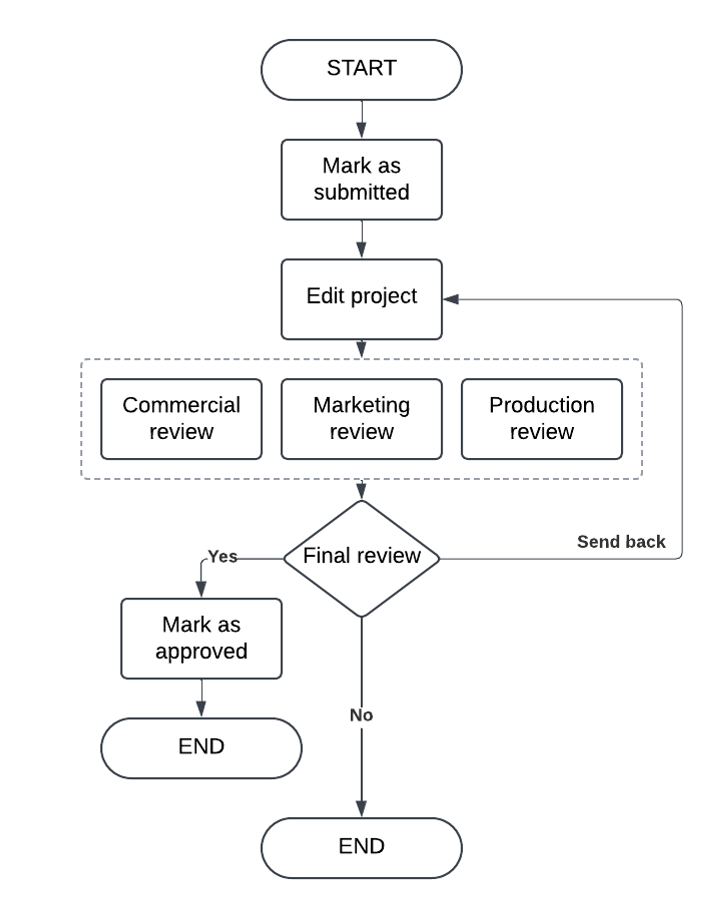
By adding an initial “Edit project” task at the start of the process, carefully designed to be driven by a line item and set to “Skip on blank assignee” or an additional value-based decision step, it will be possible to create a “send back loop” from the final review. This will engage the original user with a notification allowing them to make changes based on commentary provided by the final reviewer before submitting their project back into the approval flow.
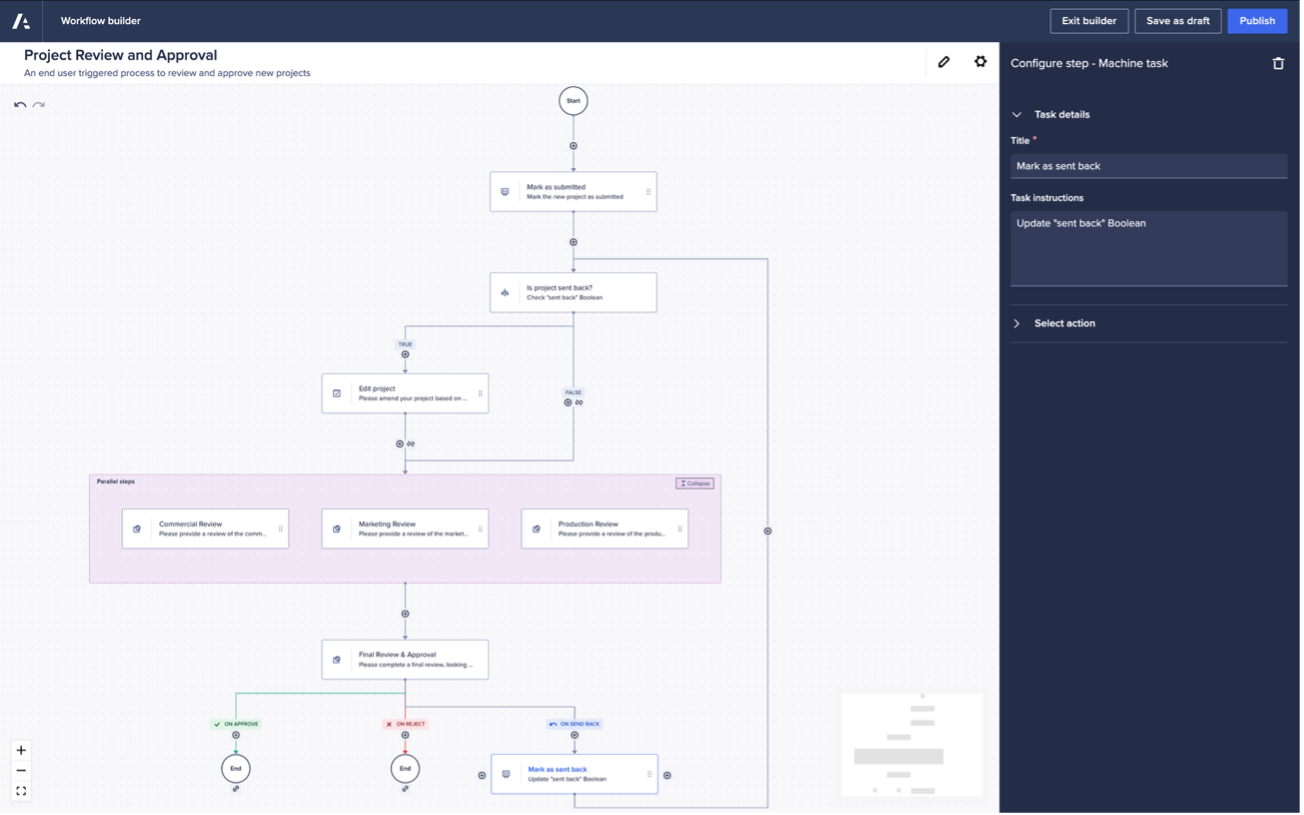
Image: An enhanced workflow template with a send-back loop from the final approval step along with an optional “edit project” step that is only used if work is sent back
If the need to bring in a final reviewer, to review the decisions made by domain expert approvers, is something you’d like to avoid in your process then you can automate this final decision step based on a Boolean value in a model.
Replacing the final approval step with a value-based decision, it’s possible to empower Workflow to review previous decisions and direct the flow of the process as required.
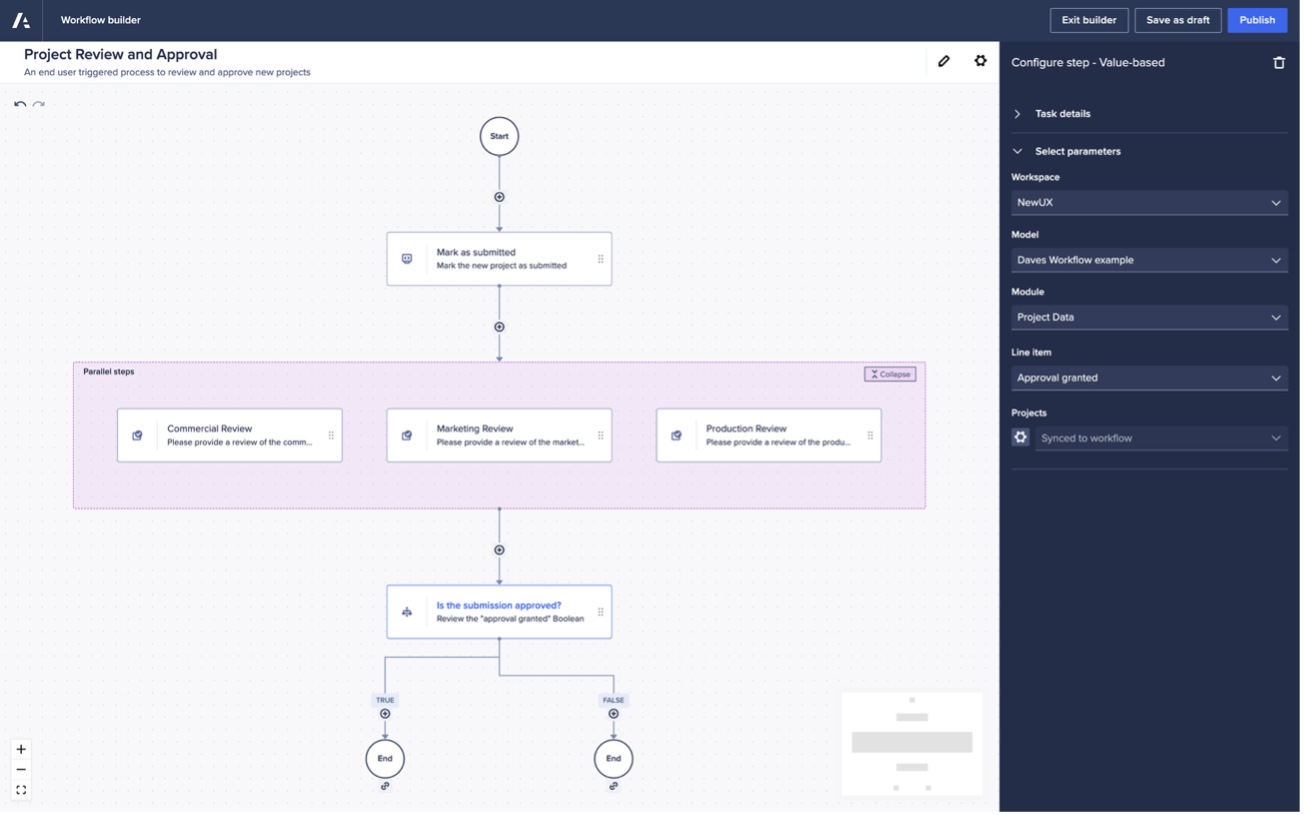
Image: Using a value-based decision step to automate the final approval decision
This will let you use any logic needed to analyse the previous approvals, adding appropriate weightings and rules, to determine whether the final decision is one of approved or rejected.
Workflow triggering
The process of creating new projects will be end user triggered and will make use of an action button on the main input page.
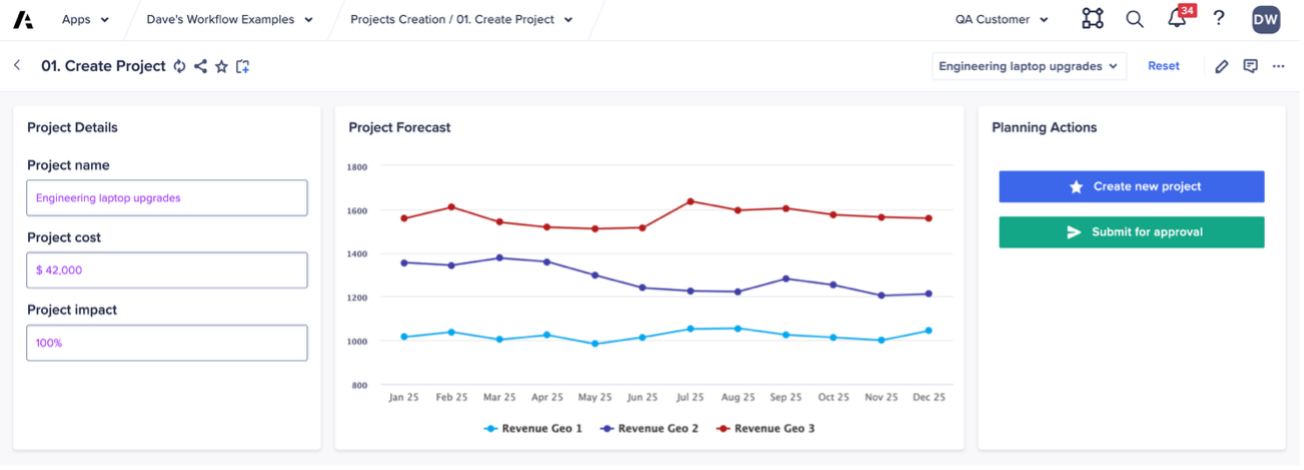
Image: An end user page for the creation of new projects
As a Page Builder we’ve selected to edit our page and then selected to edit the action card that contains our project creation form button.
We can now use the “Actions” tab to select new actions to add to the action card, including which Workflow templates we want them to be able to trigger.
The easiest way to track down the Workflow template, especially on an active tenant, is to provide a search keyword and then open the “Workflow templates” section to choose the relevant template (or templates of you want to provide access to more than one).
Finally, the Page Builder can use a combination of the “Manage” tab as well as the button styling options to create a clear call-to-action for end users. The Page Builder could even go a step further and select a “line item driver” for the button – a Boolean line item that controls whether the button is clickable or not. By adding this, builders can control, using model logic, whether the new project is in a state where it can be submitted into an approval workflow – are all fields populated, do the values fall within acceptable thresholds, etc.
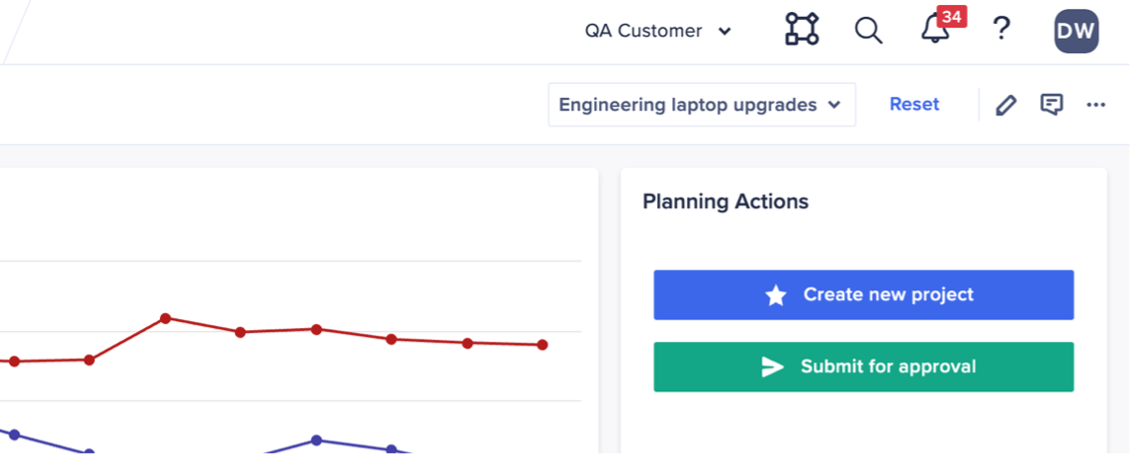
Image: An end user page for the creation of new projects, with the page-level context selector for “Projects”
As our Workflow template steps have the “Projects” dimension set to “Sync to workflow”, each time a workflow is started using an action button on a page the selected item in the “Projects” context selector is passed into the workflow. This will then be used to control the specific data points workflow will look at to determine assignees, approvers and data writes.
Download step-by-step PDF
A comprehensive step-by-step walk-through of this process, with additional photo examples, can be downloaded here:
Questions? Leave a comment!
…………..
Related Workflow content: