
Author: Paola Malafaia is a Certified Master Anaplanner and Associate Consultant at Cornerstone Performance Management.
After setting up Territory Maps, I had a few learnings and I thought it would be helpful for other developers to put some notes about the basic settings of this mapping feature for dummies. The goal here is simple: turn complex geographical data into immediate, undeniable business insight.
The developer’s two map types
First of all, there are two types of map you can deploy within Anaplan to visualize data:
- Marker: This is the precise, point-based map. It relies entirely on latitudes and longitudes established for each element (e.g., placing a pin on every store). Great for density, but messy for large-area performance.
- Territory: This is the high-impact, strategic map. It uses the definition of an area (a state, a zip code, a region) to establish shades or colours over it. Its core purpose is to paint an entire region based on a single aggregated metric (e.g., painting a state green if sales are above $1m$). The key is referencing the standardized geocode provided by Anaplan.
Setting up a simple territory layer (the practical steps)
To get this powerful visual working, follow these three steps:
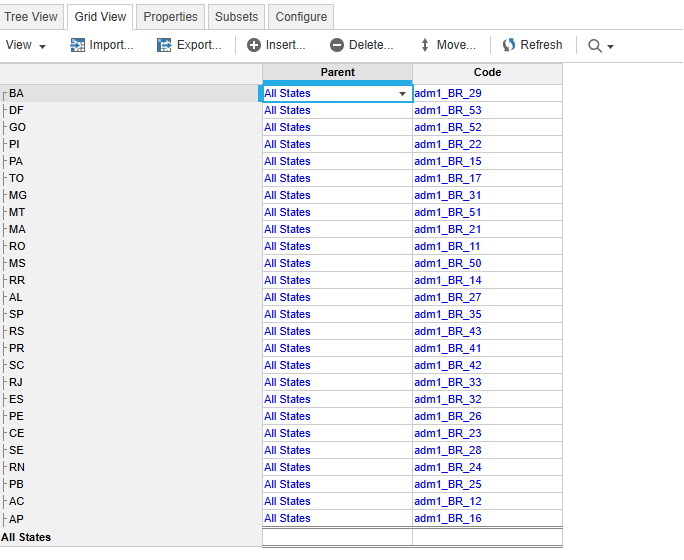
- Setup your geo list with the required geocode property.
- You can setup this as the list code or some other property, but the code used must follow the Anaplan geo-mapping standards as in this link: Anapedia: Geo-mapping downloads.
- Example: we are setting up below the Brazilian states with the geocode assigned directly to the code property of the list. It links your internal data to the specific, drawable area on the map and this format must align with Anaplan's mapping engine standards.
- Create the map card and configure the territory layer.
- Create the map card. The key is to select a module view where the geographical list (the one containing your geocode property) is positioned on the far left — note that although in the backed, the view below was created with conditional format which is to be used later in the settings.
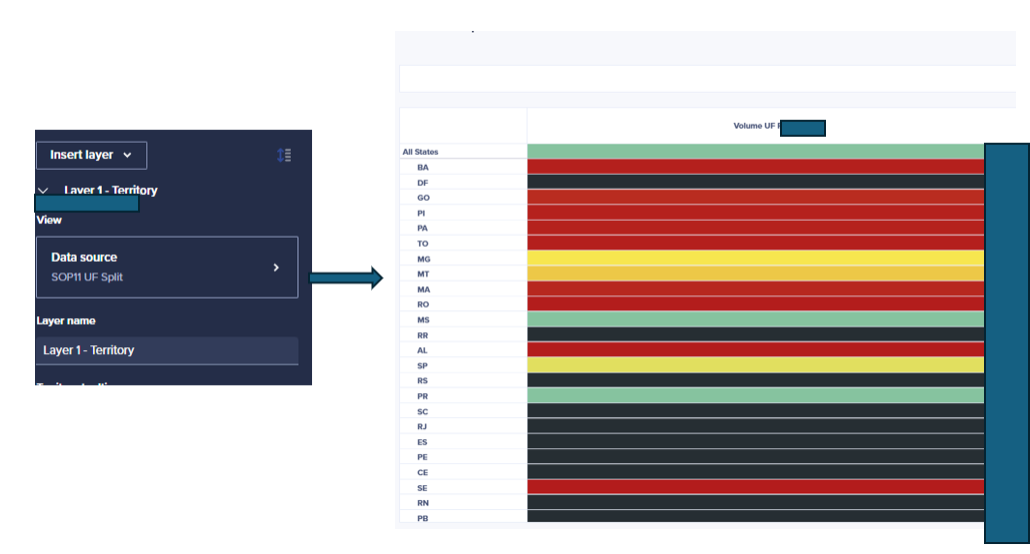
- In the map's configuration pane, explicitly point the map to the geocode property you created.
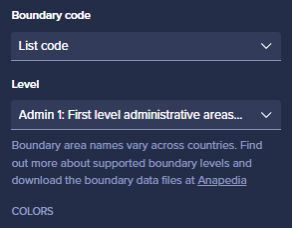
- Setup the conditional formatting.
- Setup the conditional formatting setting for the nice colour/territory relationship (note that the view above was created with the conditional formatting inside it which is to be used here).

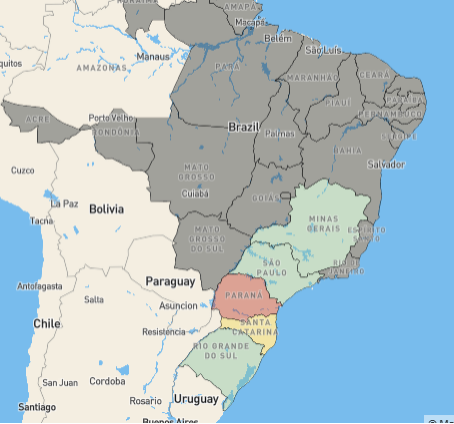
And below we have the outcome:
Use cases: Where this functionality drives action
The strategic power of territory mapping shines brightest when performance is tied to geography.
- Sales and target management
- Scenario: A national sales team needs real-time quota visibility across regions.
- Map configuration: Geocodes are tied to sales territories. Conditional formatting is set to the Target Attainment % metric (e.g. Red below 80%, Green above 100%).
- Actionable insight: The VP instantly spots a cluster of red territories in the Southeast, triggering an immediate reallocation of coaching resources or marketing spend to those specific areas.
- Supply chain and logistics optimization
- Scenario: Tracking inventory risk and potential stock-outs across distribution centers (DCs).
- Map configuration: Geocodes are tied to DC service territories. Shading is based on the Days of Supply calculation (e.g., deep red for <15 days).
- Actionable insight: Logistics instantly sees that all DCs serving the West Coast are flashing red, indicating a regional systemic issue (like a transit blockage), allowing for immediate, targeted high-cost expediting to prevent stock-outs.
- Strategic resource allocation
- Scenario: Planning where to open new branches or hire field service technicians based on demand.
- Map configuration: Geocodes are tied to zip codes or counties. Shading is based on a calculated Demand vs Capacity Gap (High demand, low capacity = Dark Red).
- Actionable insight: The planning team receives undeniable, geographically precise justification for allocating capital expenditure (CapEx) or hiring budgets to the areas displaying the most severe gap.
Questions? Leave a comment!


